Most machines have rotating parts, and rotating parts vibrate. Measuring how and how much those parts vibrate can tell you a lot about the health of a machine. Whether it's the rumble of worn bearings or the shaking, shimmying, or thumping of loose, misaligned or unbalanced parts, machines have a tale to tell those who are willing and able to listen.
The art and science of measuring and interpreting those telltale rumbles and shakes–vibration analysis–has been around for decades. Although historically the domain of specialists operating specific instruments for corporations and government agencies with mission–critical equipment, mechanics also utilized vibration analysis using a makeshift stethoscope or similar tool. Vibration analysis on rotating machinery has gained popularity over more than four decades because thousands of faults can be identified without stopping the machine or tearing the machine down. Recent developments in vibration sensors, data acquisition, and analysis technologies, however, are making vibration analysis cheaper, easier, and more widely available.
Vibration analysis is a critical component of a condition–based maintenance system. An alternative to the "run to failure" strategy, condition–based maintenance measures machine health, which doesn't require tearing a machine down to find out its condition. When a machine condition fault comes up, a repair is scheduled when it's needed–not before and not too late.
Here's how it works: By analyzing the patterns and amplitudes of the vibration peaks at specific frequencies, rules and algorithms have been developed to diagnose problems with machines. This is accomplished by securely attaching a sensor (typically an accelerometer) to the bearings of the machine, and measuring the vibration frequencies that transmit from the rotating shaft through the bearings into the outside metal surface of the machine and then into the sensor.
Among the most important mechanical faults that vibration analysis can reveal are the following:
- Imbalance – A "heavy spot" in a rotating component causes vibration when the unbalanced weight rotates around the machine's axis, creating a centrifugal force which will cause advanced wear in bearings and seals and wasted energy.
- Misalignment – high forces can result when machine shafts are out of line. Misalignment forces on the shafts (for example) a motor and pump will cause advanced wear to the bearings and seals and wasted energy.
- Wear – As components such as bearings, drive belts, or gears become worn, they may cause vibration. When a roller bearing race becomes pitted, for instance, the bearing rollers will cause a vibration each time they travel over the damaged area. A gear tooth that is heavily chipped or worn, or a drive belt that is breaking down, can also produce vibration.
- Looseness – Vibration that might otherwise go unnoticed may become obvious and destructive if the component that is vibrating has loose bearings or is loosely attached to its mounts. Such looseness may or may not be caused by the underlying vibration.
Vibration tools to the rescue
For the past 30 years, there have only been two tools for vibration analysis–the high end analyzer and the vibration pen (or maybe the screwdriver to the ear). Recently, two new categories of vibration test tools have gained popularity to help the mainstream technician fill the void between complex vibration analyzers and simplistic pens. These new vibration tools are the vibration tester and the vibration meter.
Vibration analyzer
Vibration analyzers conduct a sophisticated analysis of machine condition. They analyze vibration spectra (vibration amplitude versus frequency), create a baseline for the tested equipment, and trend the results over time. This sophisticated analysis not only provides information about whether there is a problem, it also helps users understand the root cause and time to failure. However, this traditional type of vibration troubleshooting requires a significant amount of training and a strong understanding of the spectra and equipment's history.
When to use:
- For big, complex machines with many variables, such as paper machines, multi–axis machines, turbines and etc.
- For troubleshooting using real time analysis, bump testing, cross channel phase, and resonance testing for faults other than the 4 common faults described above.
Vibration pen
A vibration pen is a single–use tool that measures vibration caused by rotational and structural problems, and can help identify some rolling element bearing or gear mesh problems.
Vibration pens are easy to use and provide a simple number of the overall vibration coming from the machine. However, the number requires knowledge about the machine to determine what the number means. Is this number bad for this machine, how bad is the fault, what is the fault, and what action is needed?
When to use:
- For simple diagnostics of less complex machines.

Vibration meter
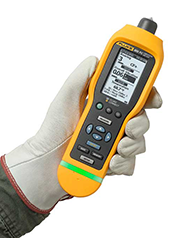
When you move up to a vibration meter, you have the capability to measure overall vibration in addition to a database of real machine values to provide the user with an answer. The Fluke 805 Vibration Meter has a combination vibration and force sensor tip that compensates for user variance (force or angle) – yielding accurate, repeatable readings. This meter has a four–level severity scale and onboard processor that provides both bearing condition and overall machine health using easy–to–understand textual alerts. In a couple of seconds, it can measure a wide range of frequencies (10 to 1,000 Hz and 4,000 to 20,000 Hz), covering most machine and component types. The Fluke 805's straightforward user interface minimizes user inputs to RPM range and equipment type. This gives frontline maintenance personnel and operators a screening tool to determine which equipment is healthy and which needs further testing.
When to use:
- Check all machines – hundreds of expendable machines as well as a quick check of the critical machines daily in–between testing by the analyst.
- For screening all machines (100%): use overall vibration, bearing impacts and bearing temperature to determine is machine is good or bad. The vibration meter is five tools in one – not just one like the vibration pen.

Vibration tester
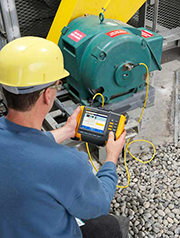
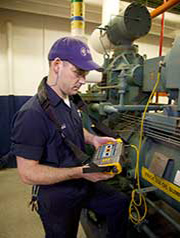
Vibration testing provides automated diagnosis of the most common faults on most rotating machines – specific fault, fault severity and repair recommendation. The tester starts as a 4 channel vibration data collector, but then many features and functions are modified to make it easy to use by a technician with minimal training and experience. An experienced vibration analyst may feel that they need these functions but a large team of vibration experts working over 30 years have proven that complex and advanced troubleshooting techniques are not needed to diagnose the most common faults in most rotating machines. Put another way, you don't see a surgeon if you have a cold or flu – you see the general practice doctor. Let the tester help you find the most common faults and leave the advanced troubleshooting to the analyzer.
When to use:
- For most machines with few variables motors, pumps, fans, compressors, blowers, belts, gears
- For diagnosing common machine faults (90%): imbalance, misalignment, bearings, looseness
- For technicians that have many other tasks that need to get done (no time to analyze complex graphs)

The tool that saved the dairy
Maintenance manager Eric Trummel of Alpenrose Dairy in Portland, Oregon recalls an incident when a vibration–analysis contractor doing a semi–annual check warned of bearing deterioration in an important air compressor. One of the bearings had gone bad and the team needed to take care of it within several months. "The next week the air compressor went down, and it represented a limitation of the plant. That's when I realized these guys may not know what they're doing," said Trummel. "This is why this Fluke 810 is relevant to us," Trummel continued. "It's good to have this capability in house and check this equipment every couple of weeks. We get a better idea and a better feel for what's going on."
"Using the Fluke, we're able to take a reading once a week or once a month," said Trummel . "If we notice something different we can build a trend analysis with that data. If we notice there's a change in our frequencies, that's something we need to look at. Of course we won't be able to do every piece of equipment here at the dairy every single month. We'll prioritize what equipment we want to check on a monthly or a quarterly basis, and I'm basing that on my baseline reading."
Vibration Testing Principles
Vibration measurements are not like temperature or voltage measurements. Using electrical test equipment, you might expect to read a number that is repeatable time after time. Using a piezoelectric accelerometer to measure vibration from a dynamic machine train is a different story. You aren't measuring the vibration at the source of vibration (from the rotating shaft), but instead are measuring from the bearing housing of the machine. This means that you are really measuring the response of the machine's structure to the vibration from the rotating shaft inside, the components on the shaft, the bearings, the covers and the foundation. There are many random vibrations mixed in with the vibrations from the rotating shaft. Even the repeatable vibration from the rotating shaft has many variables – resonances, speed and load, location, sensor mounting, environment, operational, noise, excitation, and other machine influences.
How to reduce random vibration, noise and variables:
- Make sure the machine is at the same speed and load each time a measurement is taken
- Make sure the machine is running at the same operating conditions
- Make sure the same machines in the area are running at the same operating conditions
You can do your best to minimize the random vibration and reduce the variables, but vibration spectrum is not ever going to be exactly the same. The only way that you would ever see this kind of repeatability would be in a lab environment in space. By the time the vibration from the rotating shaft transmits through the bearing, to the outside of the bearing housing, into the sensor that is attached with a magnet and mixed with the resonances and noise of the machine, the foundation, the surrounding structure and adjacent machines, there are just too many variables to expect exact repeatability, which is why using the right tool is so critical.
After decades of either primitive (think screwdriver) or extremely unwieldy and expensive vibration analysis, recent developments in the field have enabled a broader application of the practice. Now a critical component of condition–based monitoring programs, vibration analysis continues to evolve, with tools more easily accessible and affordable to the average user.
John Bernet is Fluke's Mechanical Application and Product Specialist. During his 30+ years of experience in maintenance and operation of nuclear power plants and machinery in other plants, John has worked with customers in all industries implementing reliability programs. John is a Certified Category 2 Vibration Analyst with over 20 years of experience diagnosing machine faults. John served in the US Navy as an electrician for 12 years. John is a Certified Maintenance Reliability Professional (CMRP).